
Getting started with the Project CRD
This feature is in BETA. Please tell me (lead developer of the feature) about your experience.
In this guide, we'll walk you through using Ambassador Edge Stack's Project CRD. At the end of this you will have launched your own microservice in less time than it takes to microwave popcorn. Not only that, but this service will meet the most important standards of production-readiness. It will be:
- Secure: Protected with TLS, Authentication, and Rate Limiting
- Robust: Complete with the usual -ilities: scalability, reliability, availability
- Agile: Can be updated quickly and frequently without disrupting users!
Before You Begin
You will need:
- A Github account.
- A working installation of Ambassador Edge Stack...
- With TLS configured. (Needed for the github webhook used to sync source changes to your cluster.)
- And access to the AES admin console: https://$YOUR_HOST/edge_stack/admin/.
Enabling the Project Controller
The projects functionality depends on an in-cluster Docker registry. By default this registry is not included in the Ambassador manifests, and the project functionality is not enabled. If you have performed a manual install of Ambassador, you can include this registry and enable the project controller by running the following command:
kubectl apply -f https://www.getambassador.io/yaml/projects.yaml
Note: RBAC changes need to be made to fully activate the projects after manual project install: Apply the following to add the RBAC permissions and restart the Ambassador Pods for the changes to take effect.
---apiVersion: rbac.authorization.k8s.io/v1beta1kind: ClusterRolemetadata:name: ambassador-projectslabels:app.kubernetes.io/name: ambassadorapp.kubernetes.io/instance: ambassadorproduct: aesrules:- apiGroups: [""]resources: [ "secrets", "services" ]verbs: [ "get", "list", "create", "patch", "delete", "watch" ]- apiGroups: ["apps"]resources: [ "deployments" ]verbs: [ "get", "list", "create", "patch", "delete", "watch" ]- apiGroups: ["batch"]resources: [ "jobs" ]verbs: [ "get", "list", "create", "patch", "delete", "watch" ]- apiGroups: [""]resources: [ "pods" ]verbs: [ "get", "list", "watch" ]- apiGroups: [""]resources: [ "pods/log" ]verbs: [ "get" ]---apiVersion: rbac.authorization.k8s.io/v1beta1kind: ClusterRoleBindingmetadata:name: ambassador-projectsnamespace: ambassadorlabels:app.kubernetes.io/name: ambassadorapp.kubernetes.io/part-of: ambassadorapp.kubernetes.io/instance: ambassadorproduct: aesroleRef:apiGroup: rbac.authorization.k8s.iokind: ClusterRolename: ambassador-projectssubjects:- name: ambassadornamespace: ambassadorkind: ServiceAccount
If you use Helm to install Ambassador, you can get the equivalent by
setting the registry.create option to true in your values.yaml
file:
registry:create: true
Project Quick Start
To setup your first project:
Run
edgectl login $YOUR_HOSTand click on theProjectstab.Create an HTTP service implementation in your own new Github repo with our quick start project generator.
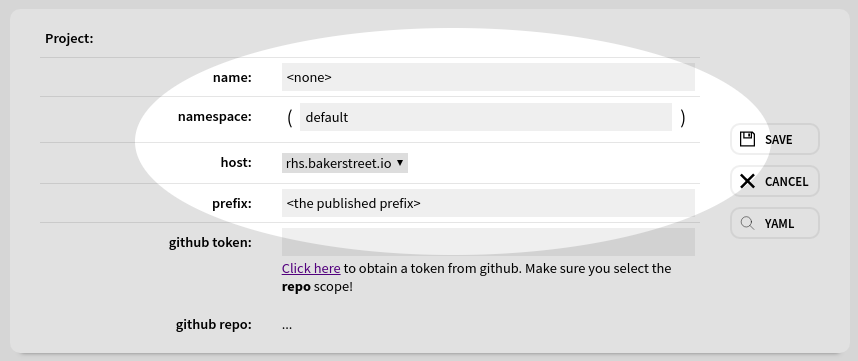
Click on Projects -> Add, you will be directed to enter the name, namespace, host, and url path prefix for your project:
You will also need to supply a github token:
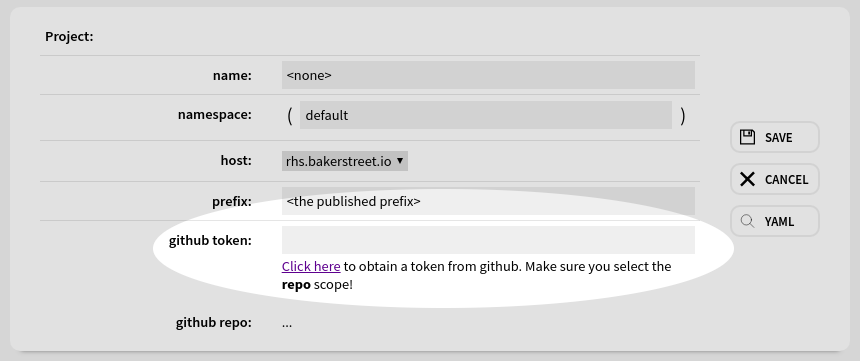
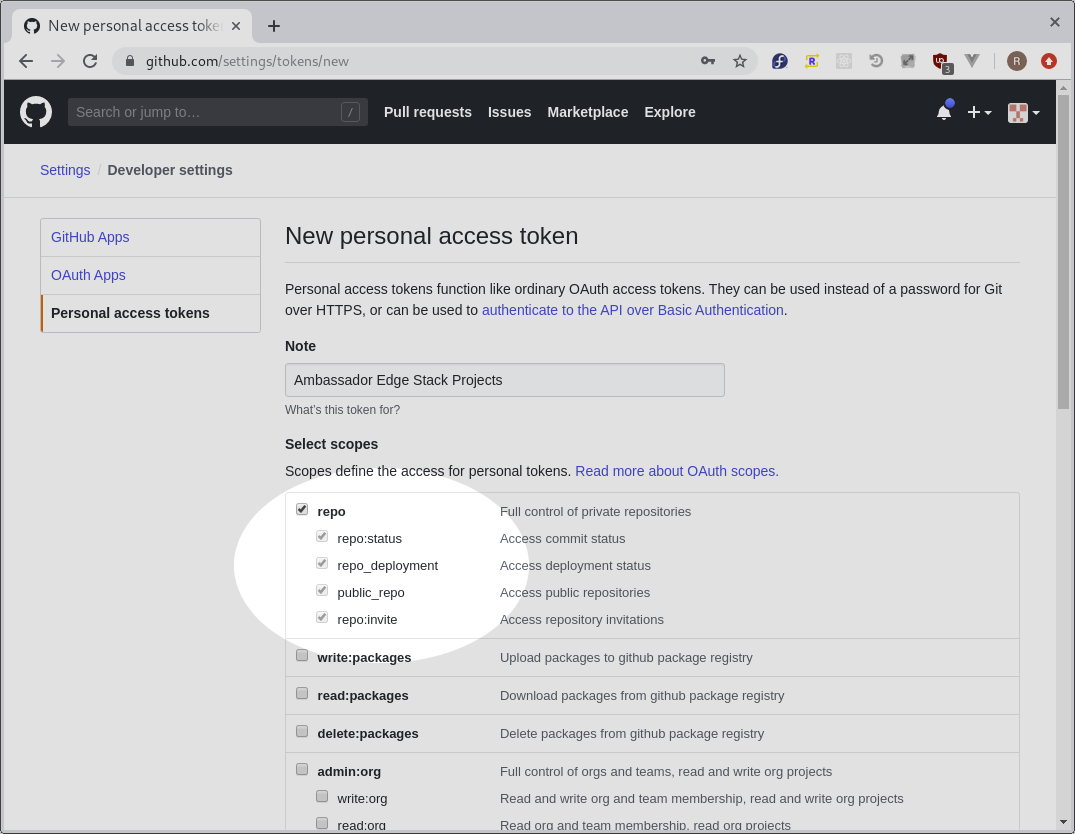
Make sure you select the repo scope for your token:
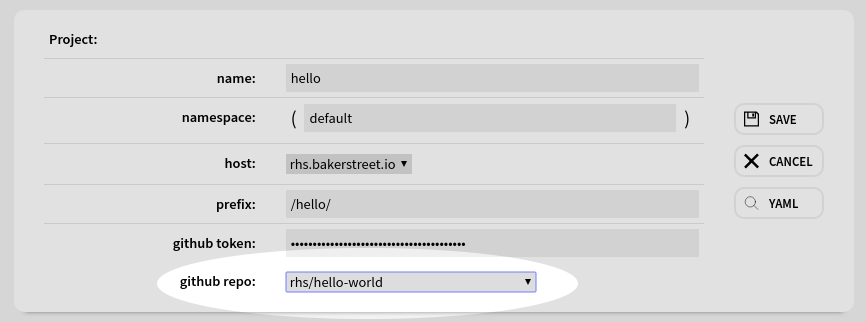
As soon as you enter a valid access token, you will see the "github repo" field populate with all the github repos granted access by that token. Choose your newly created repo from step 3 and click Save:
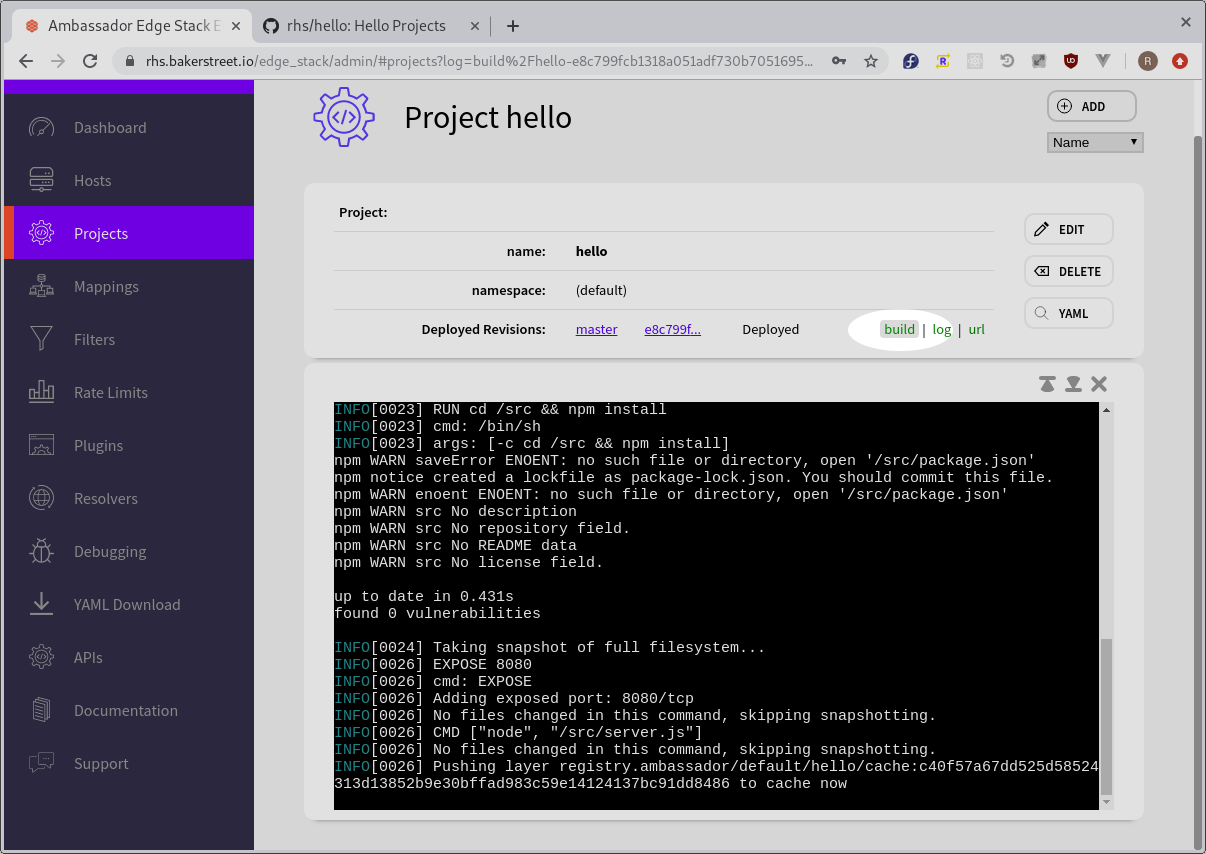
You will see the Project resource automatically build and deploy the code in your newly created repo. Building the first time will take a few minutes. Subsequent builds will be much faster due to caching of the docker image layers in the build. To follow the progress of building, you can click on the "build" link to see your build logs streamed in realtime:
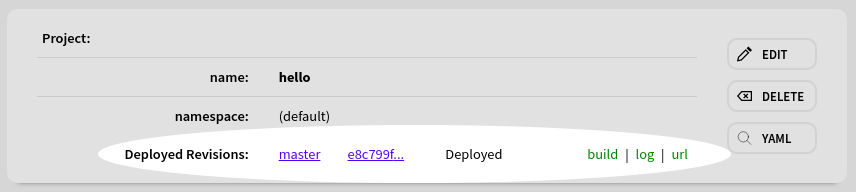
When your build and deploy succeeds, the project will show the master branch as "Deployed" and the "build", "logs", and "url" links will all be green:
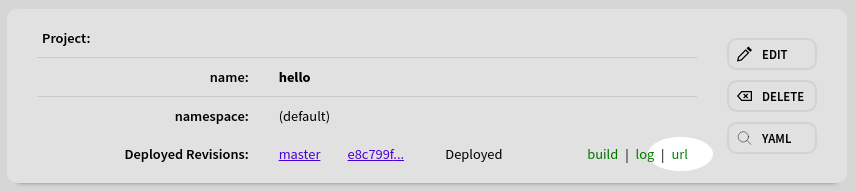
Click the "url" link to visit your newly deployed microservice:
Viewing Server Logs
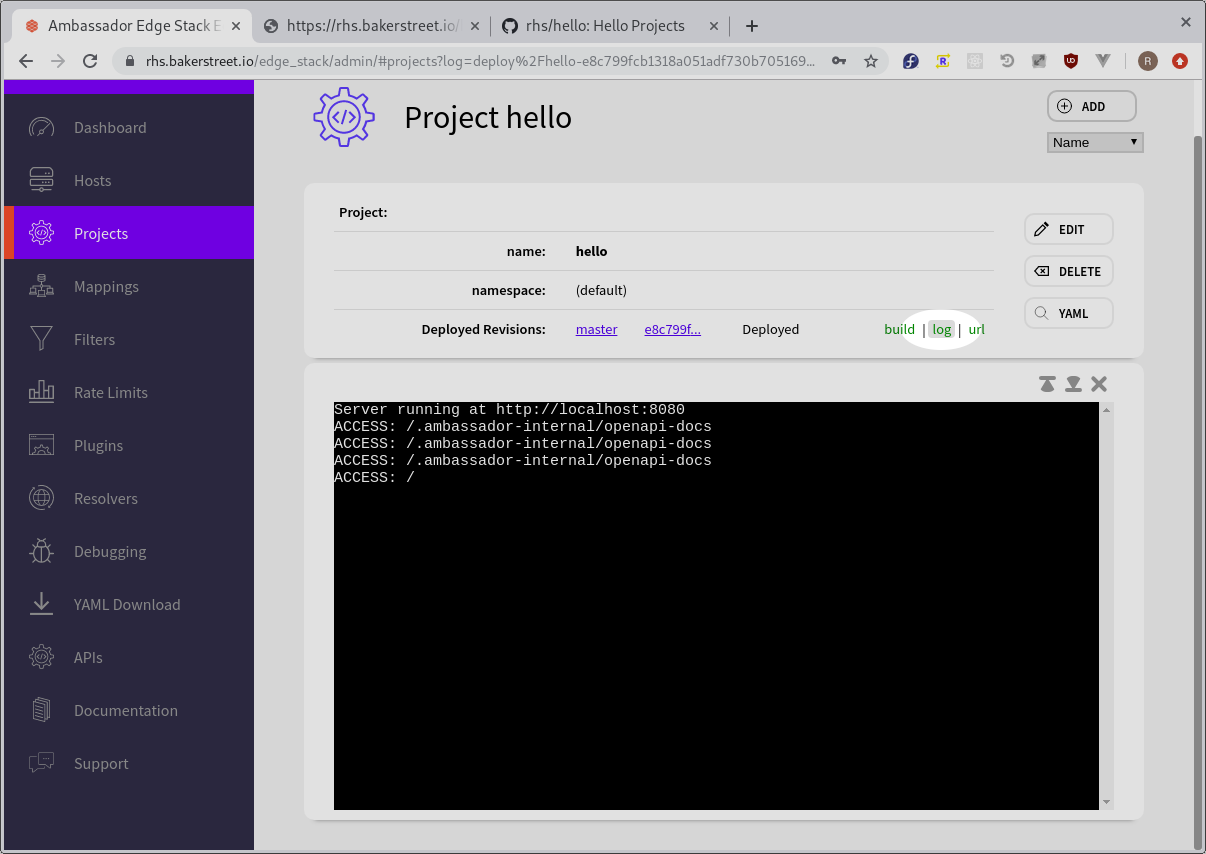
You can use the Projects Tab to access the server logs for your project. Click on the "log" link next to the master deployment of your project, and you will see realtime log output from your server:
Making Updates
We are going to update our project by creating a pull-request on Github. The Project resource will automatically build and stage the PR'ed version of our service so that we can make sure it works the way we anticipated before updating our production deployment.
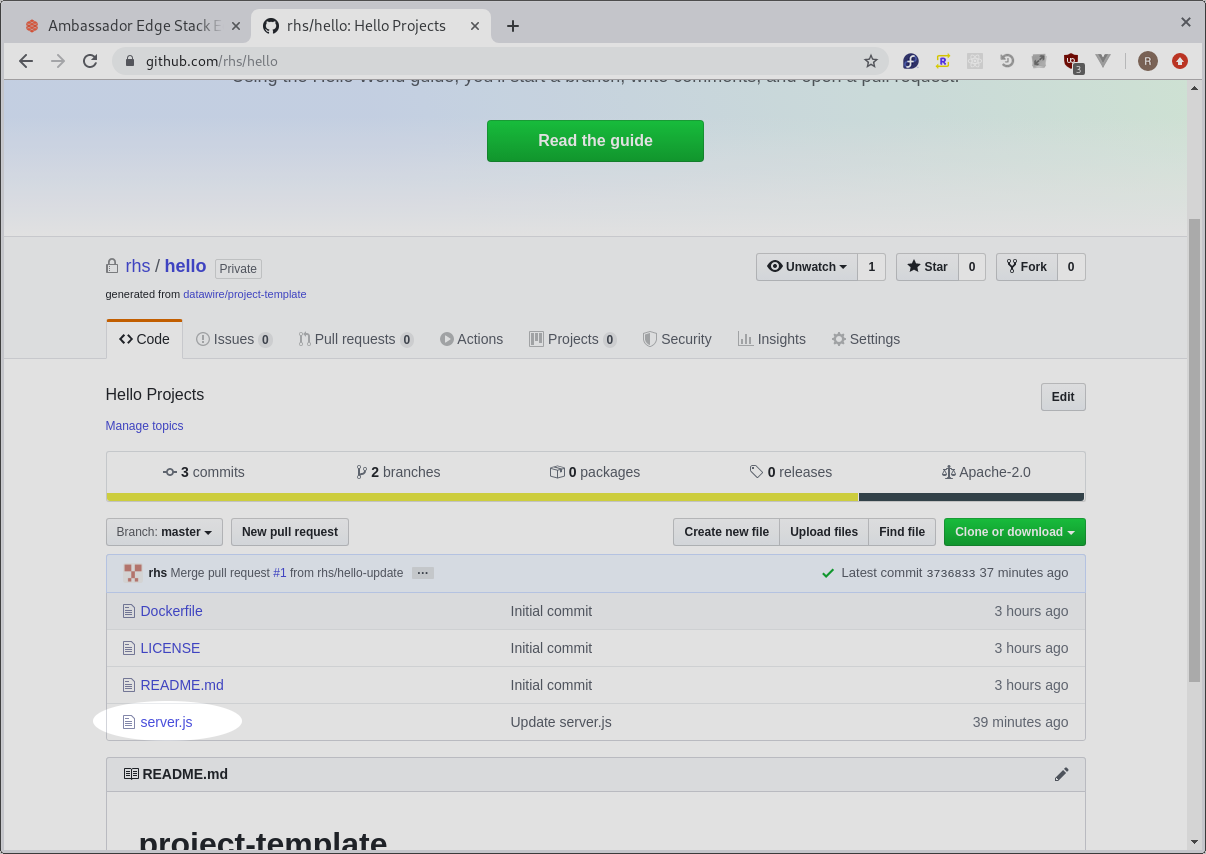
- Go to your git repo in your browser and click on server.js:
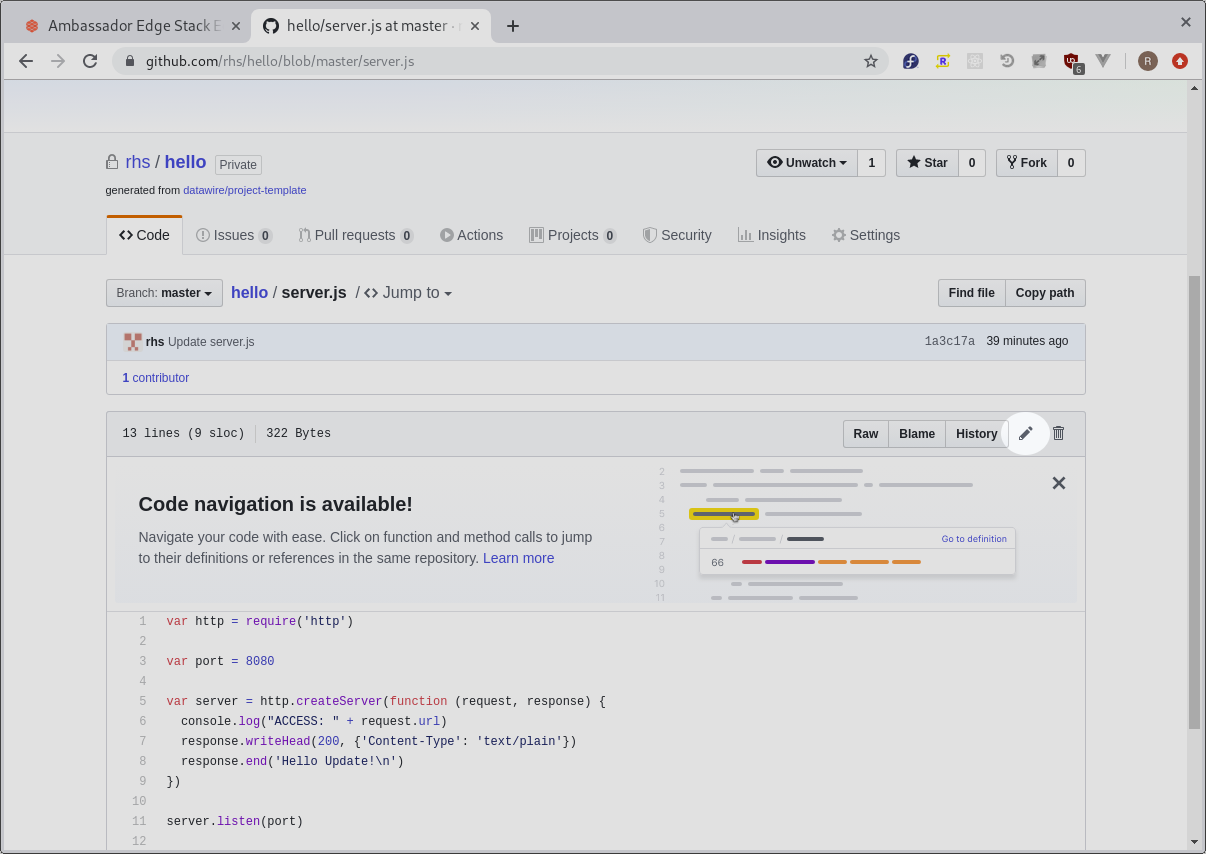
- Click on the edit icon:
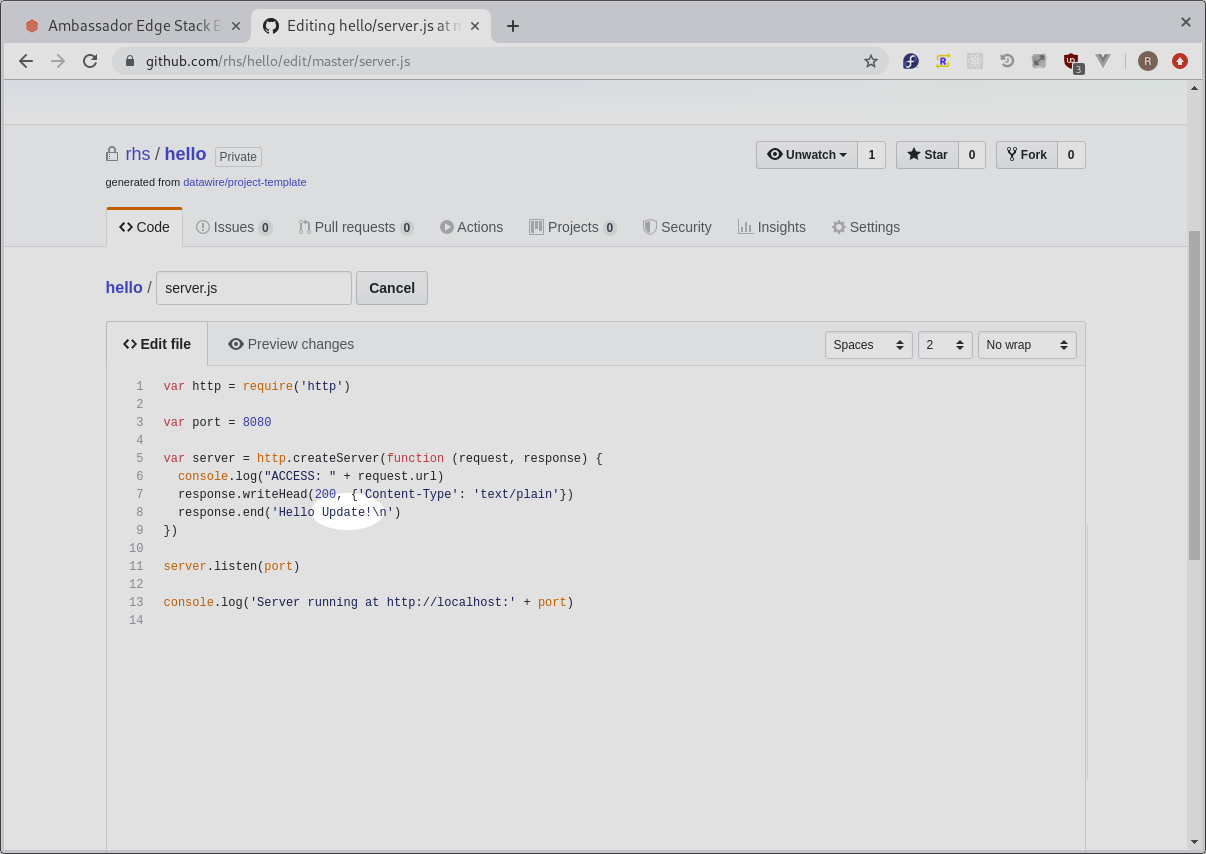
- Change "Hello World!" to "Hello Update!":
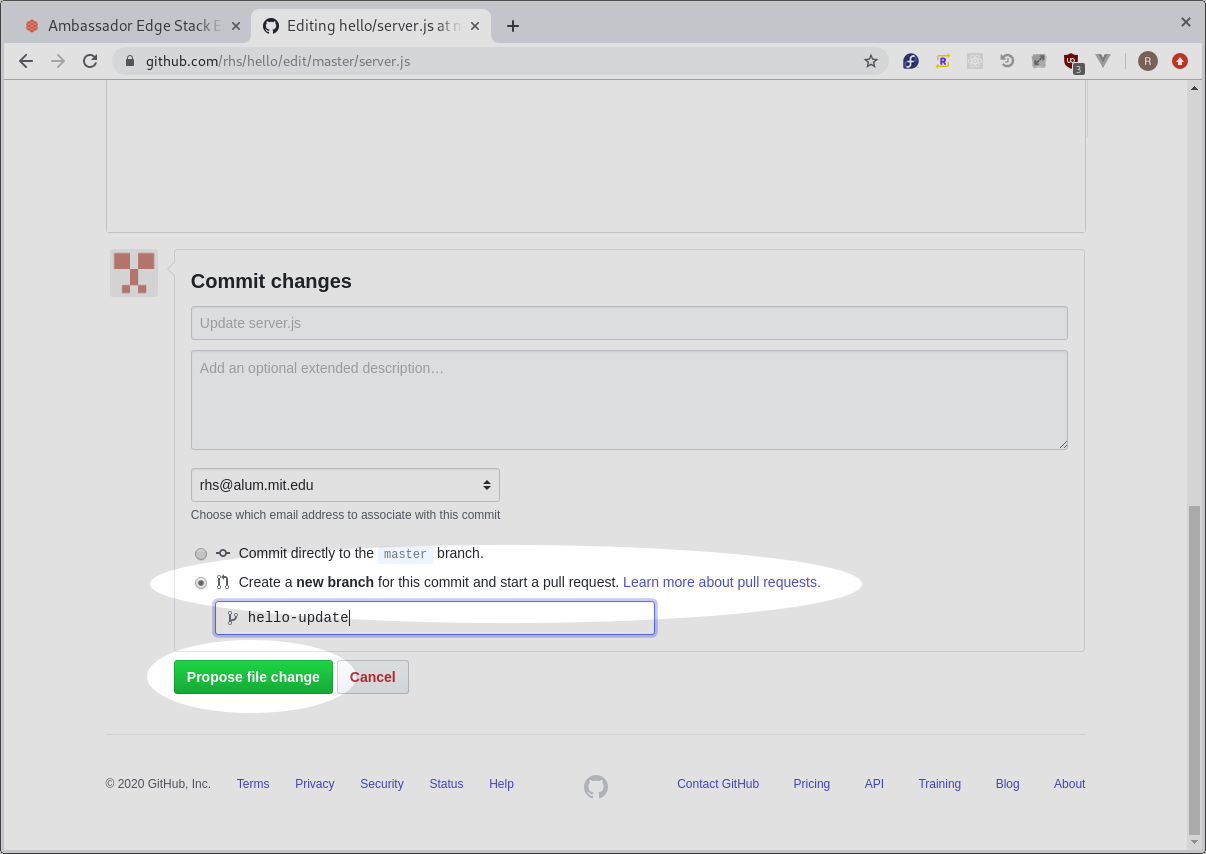
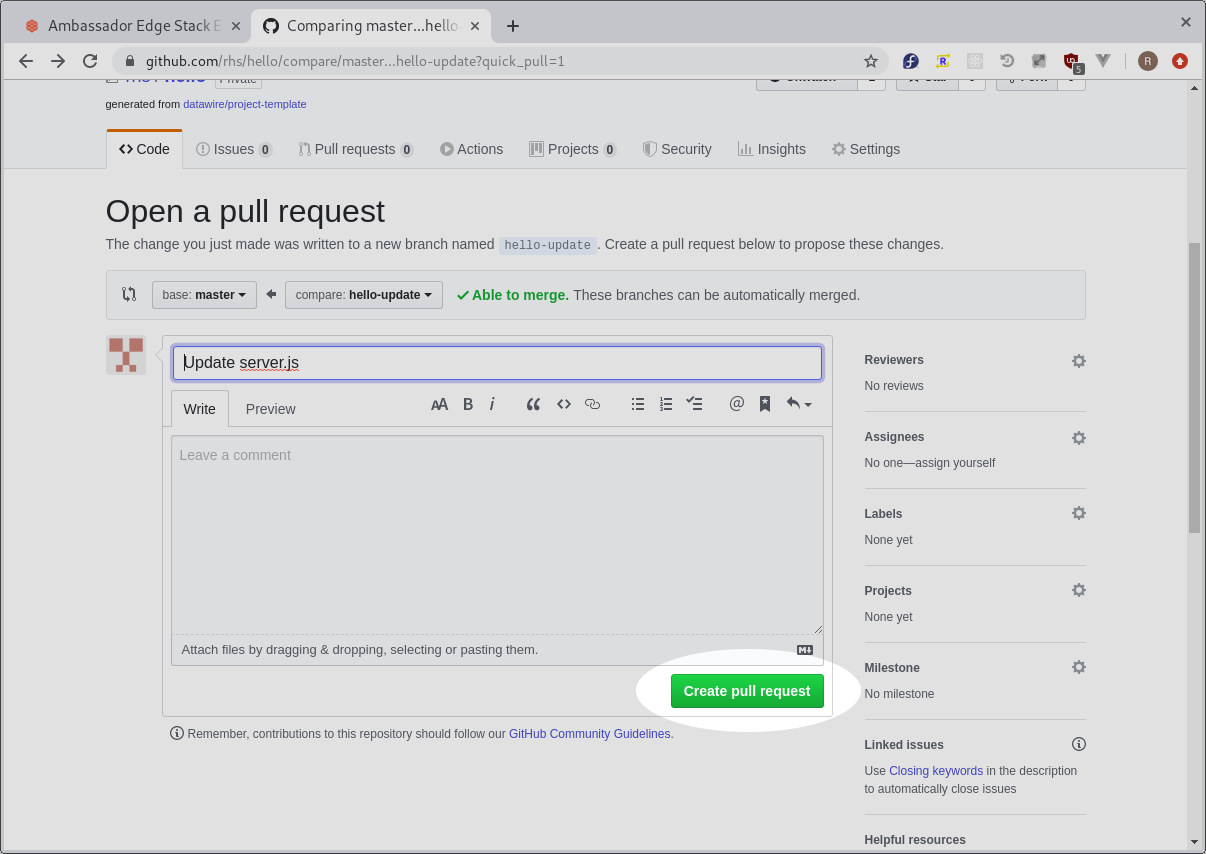
- Select "Create a new branch for this commit..." and then click "Propose file change":
- Create the Pull Request:
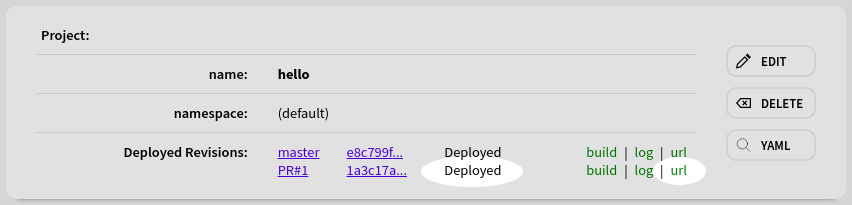
- Now go to the Projects Tab, you will see the Pull Request you just made being built and staged. When the status reaches Deployed, you can click on the preview url link:
- You will see the updated version of your code running at a staging deployment. Note the preview URL. Every PR gets published at its own preview URL so you can have as many simultaneous PRs as you like and test them however you like before merging:

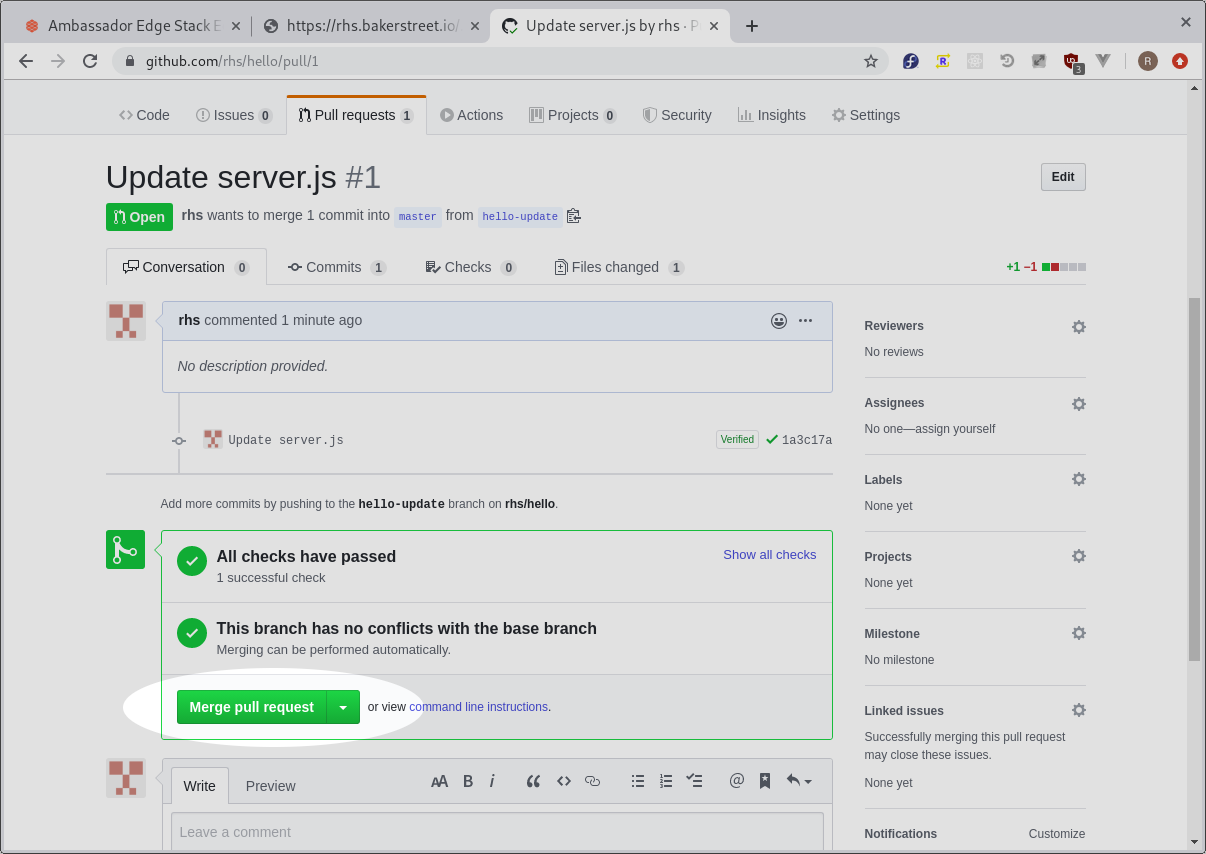
- Once we are satisfied with our change we can go back to github and merge our PR:
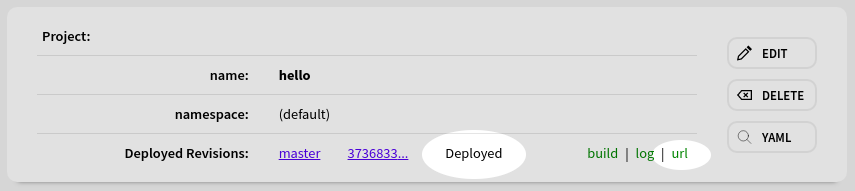
- After master finishes building and reaches the Deployed state, we can click on the URL:
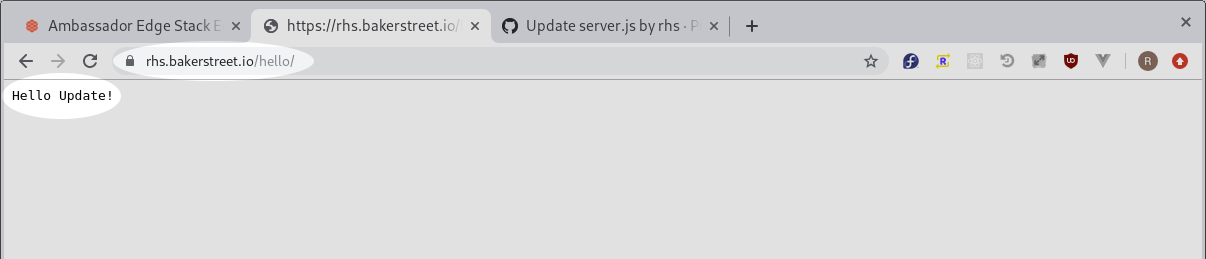
- And we can see our updated service running in production!
What’s Next?
Read more about using Projects, including how to use Ambassador Edge Stack's powerful Authentication and Rate Limiting features to secure your service.
The Ambassador Edge Stack has a comprehensive range of features to support the requirements of any edge microservice.
To learn more about how the Ambassador Edge Stack works, along with use cases, best practices, and more, check out the Welcome page or read the Ambassador Story.
For a custom configuration, you can install the Ambassador Edge Stack manually.
Questions?
We’re here to help. If you have questions, join our Slack or contact us.